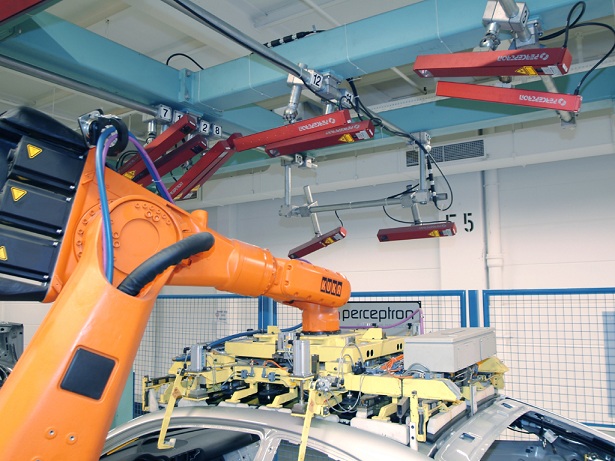
Customer Spotlight: Perceptron
 Perceptron (www.perceptron.com) provides automated metrology systems around the world to manufacturers of complex assembled products for in-process and near-line dimensional inspection. Perceptron sells automated robotic metrology systems primarily to major automobile manufacturers and suppliers. In early 2010, Perceptron adopted SpatialAnalyzer® (SA), specifically the SA Machine product, to cost effectively calibrate and compensate industrial robots to achieve the repeatability and accuracy necessary for inspection operations.
 Customer Spotlight: Perceptron
Perceptron (www.perceptron.com) provides automated metrology systems around the world to manufacturers of complex assembled products for in-process and near-line dimensional inspection. Perceptron sells automated robotic metrology systems primarily to major automobile manufacturers and suppliers. In early 2010, Perceptron adopted SpatialAnalyzer® (SA), specifically the SA Machine product, to cost effectively calibrate and compensate industrial robots to achieve the repeatability and accuracy necessary for inspection operations.
There are three main categories of robot calibration: Extrinsic calibration locates the base of the robot in the part coordinate system. Intrinsic calibration determines all of the link lengths, twist angles, joint zeros, link offsets, and stiffness parameters. Drift calibration adjusts some of the intrinsic parameters that drift over time by taking a subset of the calibration measurements throughout the process. SA Machine is used to do all of these calibrations in the Perceptron workcells.
How do Perceptron’s clients benefit from SA Machine?
SA Machine compensates for the effects of thermal variation on the robot by effectively removing the impact of robot temperature changes on measurements. For example, when you first start using a robot that has been sitting idle, the robot will physically expand as it heats up from the thermal expansion of its links. As a robot continues to heat up, the change can be as great as 0.5 mm (0.020”) or more, which can significantly impact repeatability of measurements. However, SA Machine can calculate and remove these thermal effects from the measurements so that the measurements are repeatable (typically within 0.10 mm, or 0.004” 6 sigma), regardless of changes in the robot.
When used with a laser tracker, SA Machine calibrates the robot by creating an accurate kinematic model. This allows Perceptron to report absolute accurate results in part space without requiring correlation to a reference device. For example, while an industrial robot is usually very repeatable (particularly after you compensate for thermal variation), it isn’t inherently accurate. However, using SA with a laser tracker allows the user to calibrate the work envelope of a robotic measurement system directly into the part coordinate frame. This allows Perceptron to install an absolute accurate robotic metrology system and immediately generate results that are accurate to within 0.25 mm (0.010”) without any offsets.
SA Machine reduces production line downtime because it is embedded into Perceptron’s automated gauging systems. For example, once the system is installed and running, the temperature compensation data collection and adjustments are performed automatically in between measurement cycles. This avoids downtime and prevents bottlenecks.

Is Metrology a Value-Added Component?
Yes! Perceptron achieves value-added status by bringing automated metrology directly into the manufacturing process. By being part of the process and measuring very rapidly, 100% of production is measured, thus validating the dimensional quality of every part and providing insight into the manufacturing process. This insight gives Perceptron’s customers the ability to pinpoint the root cause of variation, identify trends, and improve where necessary. Ultimately, this allows Perceptron’s automated metrology systems to establish a strong ROI rather than be labeled the “cost of quality.”
Sign up to receive our eNewsletter and other product updates by clicking here.