SA Release 2021.3
 At SpatialAnalyzer, we are dedicated to the continuous development of our core metrology software package, SpatialAnalyzer® (SA). We pay close attention to our users' feedback and regularly incorporate user suggestions into new releases. In fact, you'll find that we never stop improving and enhancing SA. Read below for the latest updates, enhancements, and fixes in SA Release 2021.3. Click here for the download page.
SA Release 2021.3
Click here to view this in pdf format.
Inspection Improvements
Relationship Construction with Alignments
Repeating alignments just got easier. A simple alignment now creates a relationship that can directly be used to repeat an alignment.
- Best Fit. This will now generate a group to nominal group relationship
- Quick Align. This will now generate a points to surface faces relationship
- Align Cloud to CAD. This will now generate a clouds to objects relationship
Each relationship includes a right-click menu option to Execute Alignment. This provides a simple means to repeat a prior alignment.
Repeated Alignments: https://youtu.be/BTsEaHGhEY0
Swatch (Surface Pt) Relationships
Surface point analysis has been simplified even further. Name control and template creation has been greatly improved.
Swatch Points: https://youtu.be/-xeYjtJRL88
Clouds to Objects/faces Relationships
Clouds to Objects or Clouds to CAD Faces relationships can now be included in an inspection list and use for trapping.

Cross Section Cloud Improvement
Added the option to use a selection of existing planes for cross section cloud construction.
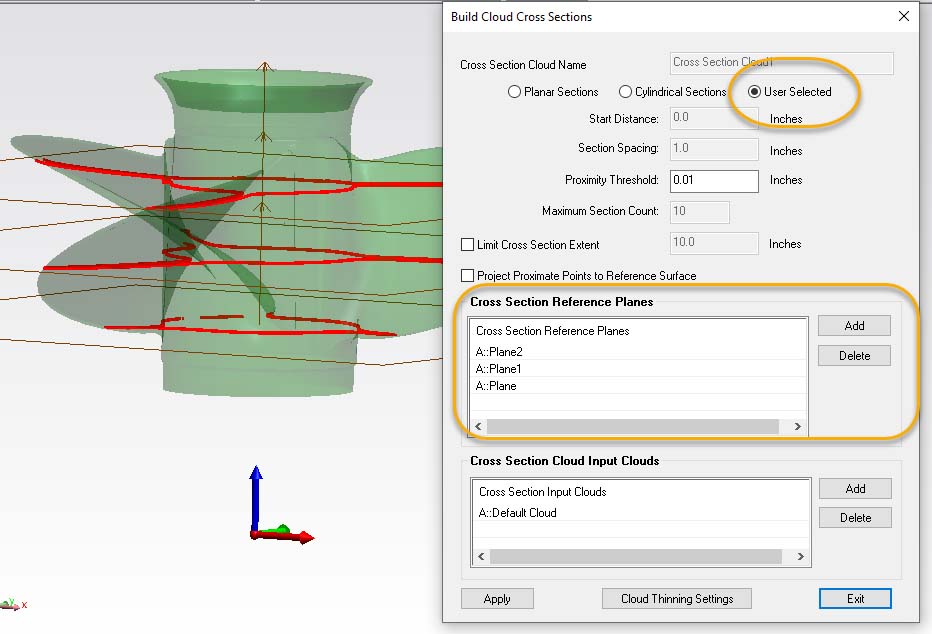
Cross Sections: https://youtu.be/C-xMDFkjcfE
Moved Clipping Planes to Features Tab
By popular demand the clipping plane controls have been moved from the Clouds and Surfaces tab of ribbon to the Features tab. This seem lines the measurement process when scanning a part and extracting features.

GR-Feature Improvements
Expanded Cylinder fit Control
Added options for asserting additional fit constraints for cylinders. These include the ability to hold the axis and/or orientation of the nominal reference feature, providing fit axial constraints for cylinder geometry relationships.

Master Criteria Edit Panel
A master criteria panel is now available in the properties for geometry relationships that allows easy access to and editing of any and all criteria settings including tolerances.
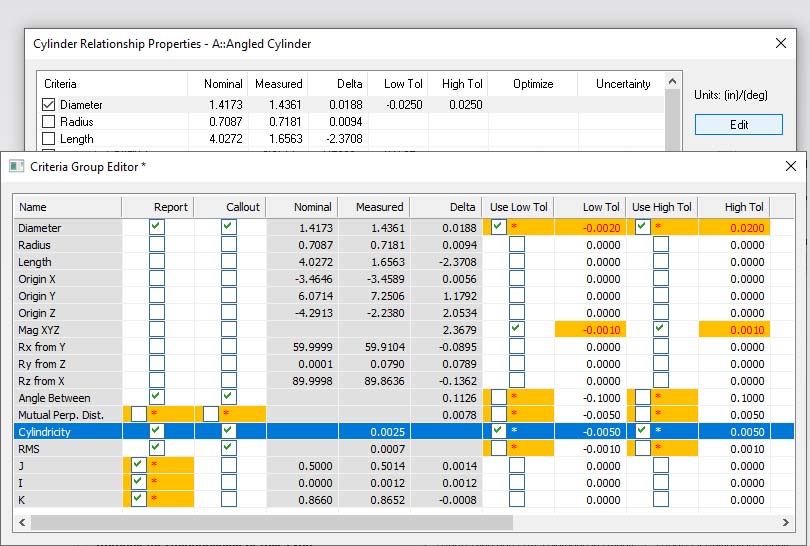
Criteria: https://youtu.be/rjkseCNg6oM
GD&T Inspection Updates
A single point sphere is now supported.
Devices that scan a sphere and return a single point to SA, such as the Laser Radar scanning a tooling ball, can now be used more seemliness with GD&T inspection routines.
Added Pin/Hole High Point Evaluation
With High Point enabled in the GD&T Options circles, ellipses and spheres will now respect the Pin/Hole designation in the Feature Check properties and fit using either a Max Inscribed or Min Circumscribed fit.
Interface Improvements
Simplified Selection and Visualization
Extended the middle mouse button Graphical Center and Ctr+middle mouse button Show/Hide function to the branch level of categories in the tree.
Added select by color and by wild card match to the F2 item select ion dialog.
Watch Window Improvements
Added New Projected Point to Objects Watch
The watch window will project the current live point position to the reference object(s) by an amount corresponding to the live point offset value in the direction opposite the reference objects normal. The data for this resulting point is then displayed relative to the measured object(s).
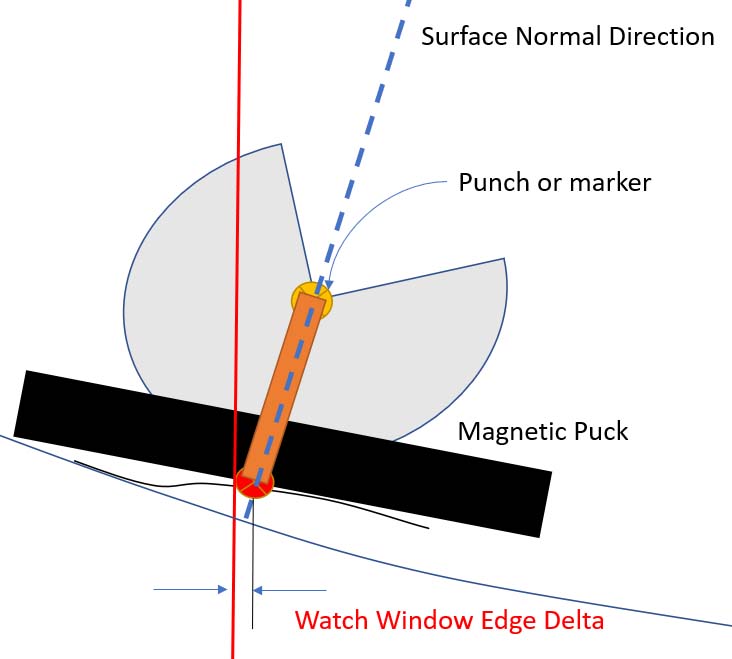
Ability to Zero a Watch Window
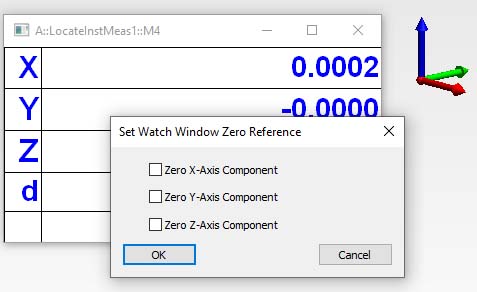
Any row of a watch window can now be zero’d through a simple double click. This saved offset is noted in the row and can be removed at any time.
Expanded Watch Window Tolerances
Added asymmetrical tolerance settings for point to objects watch windows.
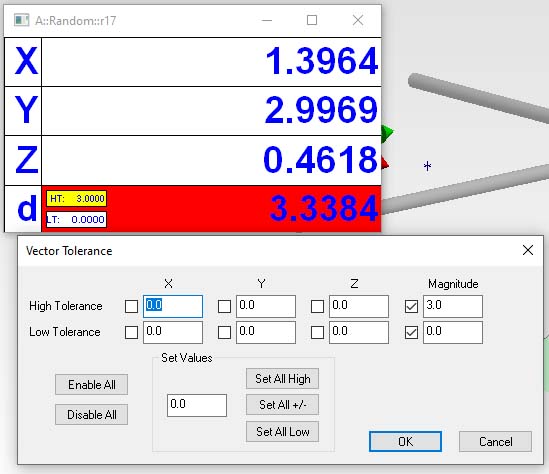
Watch windows will now gray out text after three seconds without a refresh.
Watch Windows: https://youtu.be/6iygZBqjCDs
Reporting Improvements
Hyper-links added to Callouts
Callouts can now be configured with a hyper-link to files, URLs, embedded files, MPs and Charts. Once configured the hyper-link reference can be accessed by double-clicking on the callout in the graphics.
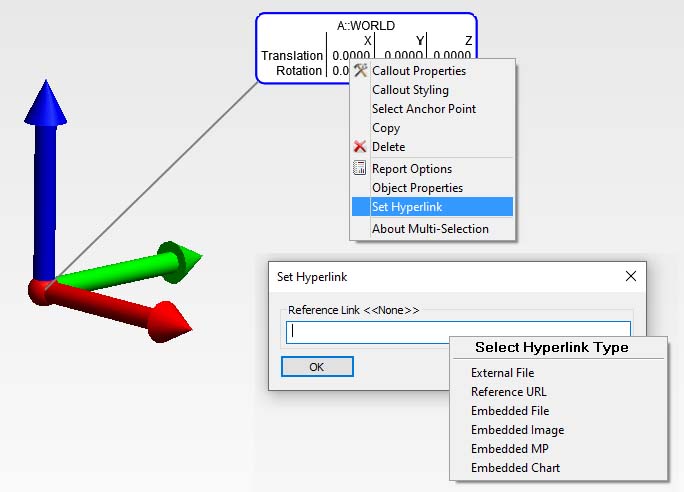
Hyperlinks: https://youtu.be/4V4vfTGLlGk
Added Signed Magnitude in Component Vector Reporting
Vector group magnitudes when based on a single cartesian component may now be optionally activated to control displayed magnitude result.
Expanded Transform and Feature Reporting
Greater transform reporting has been added to the instrument history. This should now provide a detailed log of each move made by an instrument, making it easier to follow the operations in a job file.
- Added date/time stamp information to report table for instrument alignments -- measure nominal points, cloud to CAD, cloud to MESH.
- Added measured group to report table for instrument alignments in Measure Nominal Points.
- Added nominal and actual geometry to geometry relationship report tables.
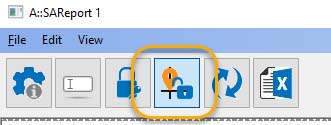
A Position Lock has been Added to SA Reports.
SA Reports can now be configured such as to lock the position of all report items without preventing them from updating or being edited. This will aid greatly in report layout and organization.
New CAD Import Libraries
Added Formats:
3MF 2020
Updated Formats:
AutoCAD DWG 2018, RealDWG 2021, AutoCAD 2019,
CATIA V5_6R2021, JT 10.5, NX 1953, Parasolid 33,
Revit 2021, Rhino 3D 7, Solid Edge 2021, Solidworks 2021
New Export Format
Q-DAS Export
SA now offers an export format that can be imported into Hexagon’s Q-DAS application, which offers advanced Statistical Process Control capabilities.

Q-DAS export has been implemented for appropriate relationships, GD&T checks, dimensions, and vector groups.
SPC Analysis Options: https://youtu.be/tEZlzNhQYfw
Instrument Updates
PCMM Arms
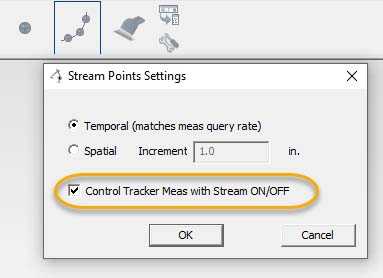
Tracker Control check mark in Arm Interface for more advanced synchronized measurement.
Hexagon Absolute arms now display the Collection, Group, and Target during measurement on the Wrist Display.
Hexagon Absolute 7-Axis Arms
Add support for the Wrist Display through RDS such that it can now display the active collection, group and target.
Laser Trackers
If a point scan (spatial, temporal, etc) is paused and then resumed, the time stamp per point will now account for the time passed since the pause.
Leica ATS600
Cloud Management
- Leica ATS600 the OVC - Scan default to creating a new cloud for each region is now asserted when working in Toolbar mode, making feature measurement easier.
- Leica ATS600 the OVC - Scan default to creating a new cloud for each region is now asserted when working in Toolbar mode, making feature measurement easier.
New Measurement Profile
- Added “Patch Scan” Acquisition and a corresponding default Measure Profile. This profile can be used to scan a small patch of a given size covering a set of nominal reference points.
Improved Automeasure
- Greatly accelerated surface measurement as part of an auto-measure routine and added the ability to recall the target type (surface, SMR, Sphere) a part of the auto-measure routine.
- Surface/Vector Intersection - added a Rejection Tolerance for a measured SVI point’s distance from the Vector.
MP Support
- Expanded MP support for Scan Within Perimeter adding support for Grow/Shrink width for regions and the ability to control line and cross line scans.
API Radian
Updated to API_SDK_v4.24.10.1, and updated code to support the IScan 3D. This adds IScan 3D support for the Radian Plus.
Nikon APDIS Laser Radar
Laser Radar APDIS MV400 has been integrated with Nikon SDK v10.05.02.5967
Added and expanded MP support for all aspects of LR operations including full support for MCM Calibration control.
Several bug fixes.
Surphaser Scanners
Reformulated the calculation of Surphaser scan segments from SA Perimeters sent via MP.
Improved notifications to user when scanner is Busy or actively Scanning.
Aligned Vision (Assembly Guidance) Laser Guide
We now allow any number of targets between 4 and 24 to be included in an alignment. Complete alignment results are now written to the SA Instrument History.
File and Directory management has been greatly improved.
MP Scripting Updates
- Filter Clouds to Surface will no longer notify collections when cloud points are being filtered to point data thereby improving the time required to perform this operation.
- Get Geom Relationship Criteria has been extended with Is within Tolerance? which returns the tolerance condition (N/A, Pass, Distance out). Has Uncertainty? returns a boolean set condition and Uncertainty output results are available.
- Added F2 menu selection option to dialog mode for MP argument entry.
New MP Commands
- Get Robot/Machine Model Link Parameters. Returns a list of the link parameters.
- Set Robot/Machine Model Link Parameters. Allows the link paramters to be set dynamically.
- Export QDAS Characteristics. Provides a means to export the selected itemFs as a *.dfq file.
- Compute Geometry Relationship Uncertainties. Triggers an uncertainty analysis for the select GR-Feature.
- Construct Cross Section Cloud - User Select. Builds a cross section cloud from the selected set of planes.
- Set Point Group Report Options. Provides a means to set the reporting options for a point group.
- Reset Cloud Bounding Box. Establishes or resets the bounding box for a point cloud
- Construct Point From Cloud Point. Builds a point from the users selected cloud point.
- Set Geom Relationship Nominal Avg Point. Sets the selected point as the nominal for a Point feature.
- Get Cloud Point Count. Returns the number of points, offsets and clipping planes set for a selected cloud.
- Edit Geometry Relationship Point List. Provides a means for a user controlled edit of a features point list for outlier rejection.
- LR APDIS Perform MCM Calibration. Provides a means to perform a MCM calibration dynamically.
- LR APDIS Activate MCM Calibration. Allows a particular calibration to be set by name or ID.
- LR APDIS Get Active MCM Calibration. Returns the active calibration by name.
- Get Geom Relationship Projection Plane. Returns the name of the reference projection plane set for the feature.
- Get Active Clipping Planes. Returns a list of the active view clipping planes.